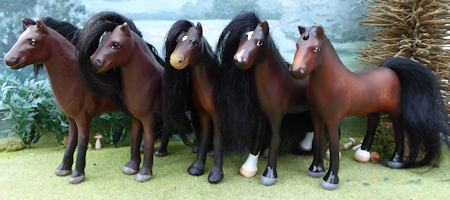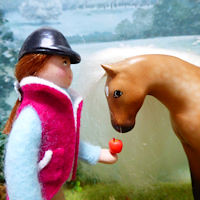
Post by stacey on Mar 29, 2020 14:22:51 GMT
Apologies in advance if this isn't very easy to follow, I've tried to make it as clear as possible - It's not too difficult to make, but is very fiddly in places!
You will need:
Ribbon - the narrower the better! For mine, I used 2mm for the muzzle and 3mm for the headcollar element.
'Funky Foam' (You could probably substitute with felt or even cardboard)
Jump rings
A Buckle (You can also alter the pattern slightly to make 2 jump rings work if you don't have any buckles)
Step 1:
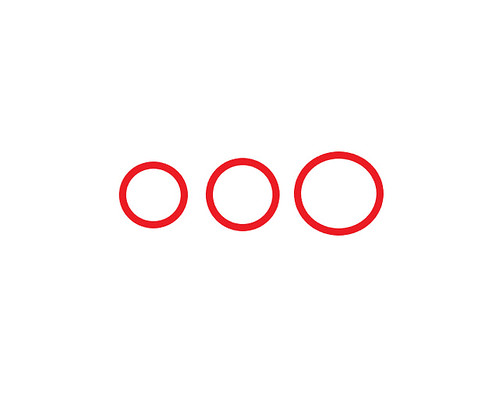
Cut your Funky Foam into a circle, just big enough to cover your Julips nose. Punch a hole into the middle.
Stick strips of ribbon at the top, bottom, left and right, then stick strips between each of these. Make sure you leave lots of extra ribbon, as you'll kick yourself later if you cut them too short!
 Step 1 by Stacey Stacey, on Flickr
Step 2:
Glue 3 circles of ribbon, make sure they fit comfortably over your Julips nose but aren't too big. If you're using different sizes of ribbon, I made the 'top' circle from the slightly wider ribbon as this will make up your headcollar noseband.
 Step 2 by Stacey Stacey, on Flickr
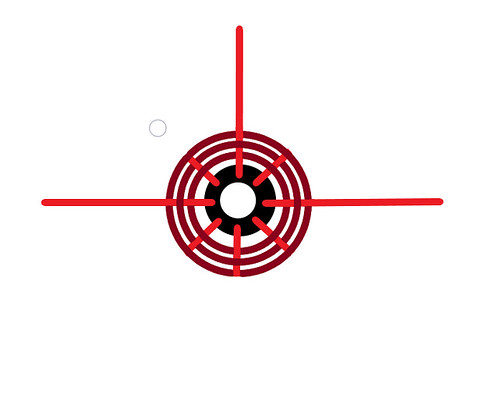
Step 3:
This is where it gets fiddly! You need to thread the smallest of your circles onto your 'spiderweb'. You need to pull alternate ribbons through your circle, then glue them in place to make the woven effect.
 Step 3 by Stacey Stacey, on Flickr
Step 4:
Repeat Step 3 with your next circle, but pull the other 4 strands of ribbon in this circle, and leave the other 4 out.
 Step 4 by Stacey Stacey, on Flickr
Step 5:
Repeat again, weaving and gluing the next ribbons
 Step 5 by Stacey Stacey, on Flickr
Step 6:
Trim all but the top, left and right ribbons. Trim them as close as you can to the noseband to get a nice finish
 Step 6 by Stacey Stacey, on Flickr
Step 7:
Separately, glue a jump ring to the end of a piece of ribbon. Then measure the distance from under your Julips throat to the side of their face and attach another jump ring. Measure an equal distance on the other side and glue on another jump ring.
Step 8:
Next, you need to measure and glue the 'top' ribbon on your spiderweb, to the middle jump ring on your new part. The left then sticks to the left ring and the right sticks to the right ring.
 Step 7 by Stacey Stacey, on Flickr
Step 9:
You need a short length of ribbon from the left ring to a buckle (generally, the shorter this bit is, the neater it looks). Then stick a longer length of ribbon to the right ring, leave it longer as it's easier to thread, it's very easy to trim it shorter later.
 Step 8 9 by Stacey Stacey, on Flickr
Hopefully that makes sense, if you have any questions let me know and I can try to get some clearer photos!
You will need:
Ribbon - the narrower the better! For mine, I used 2mm for the muzzle and 3mm for the headcollar element.
'Funky Foam' (You could probably substitute with felt or even cardboard)
Jump rings
A Buckle (You can also alter the pattern slightly to make 2 jump rings work if you don't have any buckles)
Step 1:
Cut your Funky Foam into a circle, just big enough to cover your Julips nose. Punch a hole into the middle.
Stick strips of ribbon at the top, bottom, left and right, then stick strips between each of these. Make sure you leave lots of extra ribbon, as you'll kick yourself later if you cut them too short!
Step 1 by Stacey Stacey, on FlickrStep 2:
Glue 3 circles of ribbon, make sure they fit comfortably over your Julips nose but aren't too big. If you're using different sizes of ribbon, I made the 'top' circle from the slightly wider ribbon as this will make up your headcollar noseband.
Step 2 by Stacey Stacey, on FlickrStep 3:
This is where it gets fiddly! You need to thread the smallest of your circles onto your 'spiderweb'. You need to pull alternate ribbons through your circle, then glue them in place to make the woven effect.
Step 3 by Stacey Stacey, on FlickrStep 4:
Repeat Step 3 with your next circle, but pull the other 4 strands of ribbon in this circle, and leave the other 4 out.
Step 4 by Stacey Stacey, on FlickrStep 5:
Repeat again, weaving and gluing the next ribbons
Step 5 by Stacey Stacey, on FlickrStep 6:
Trim all but the top, left and right ribbons. Trim them as close as you can to the noseband to get a nice finish
Step 6 by Stacey Stacey, on FlickrStep 7:
Separately, glue a jump ring to the end of a piece of ribbon. Then measure the distance from under your Julips throat to the side of their face and attach another jump ring. Measure an equal distance on the other side and glue on another jump ring.
Step 8:
Next, you need to measure and glue the 'top' ribbon on your spiderweb, to the middle jump ring on your new part. The left then sticks to the left ring and the right sticks to the right ring.
Step 7 by Stacey Stacey, on FlickrStep 9:
You need a short length of ribbon from the left ring to a buckle (generally, the shorter this bit is, the neater it looks). Then stick a longer length of ribbon to the right ring, leave it longer as it's easier to thread, it's very easy to trim it shorter later.
Step 8 9 by Stacey Stacey, on FlickrHopefully that makes sense, if you have any questions let me know and I can try to get some clearer photos!