How to restyle your Julips (mohair)
Jul 26, 2014 11:14:40 GMT
juliporiginals, joeypf, and 2 more like this
Post by EG on Jul 26, 2014 11:14:40 GMT
Mohair is brilliant stuff and can look absolutely fantastic on Julips but it has a reputation for being somewhat unmanageable at times. Hopefully this little guide will prove that it can be tamed!
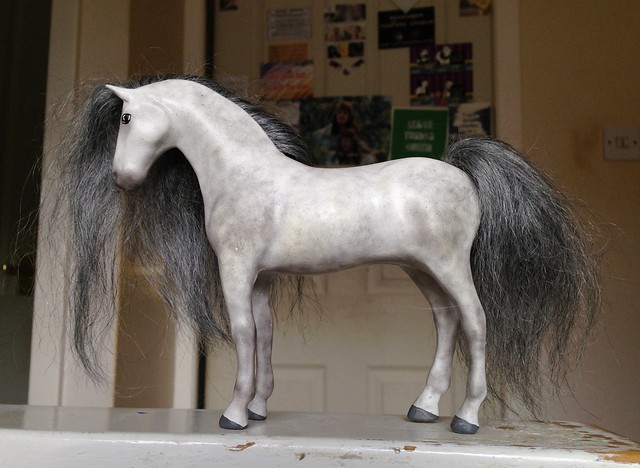
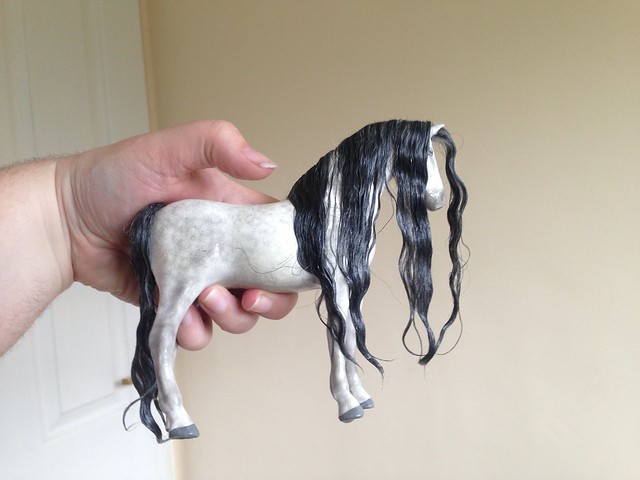
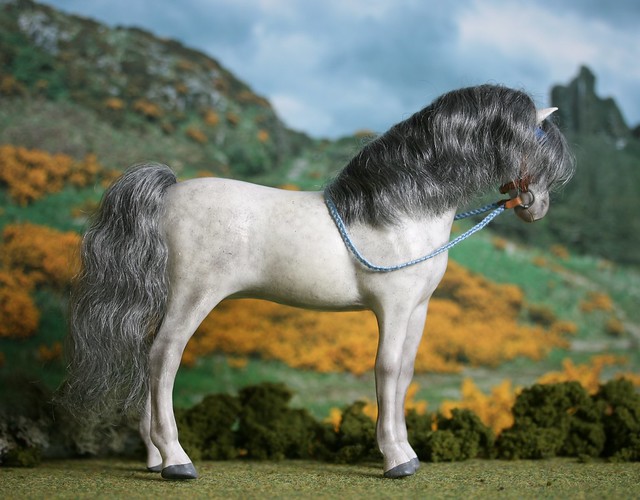
To start off with you will need a Julip with mohair already in place - this is my recent newbie from the Lakeland Live, Quinn, with his hair as it was when I bought him. (although probably a little worse for wear thanks to being packed in a box for the journey home.)
 Julip Hair Styling Tutorial by Elrenia_Greenleaf, on Flickr
 Julip Hair Styling Tutorial by Elrenia_Greenleaf, on Flickr
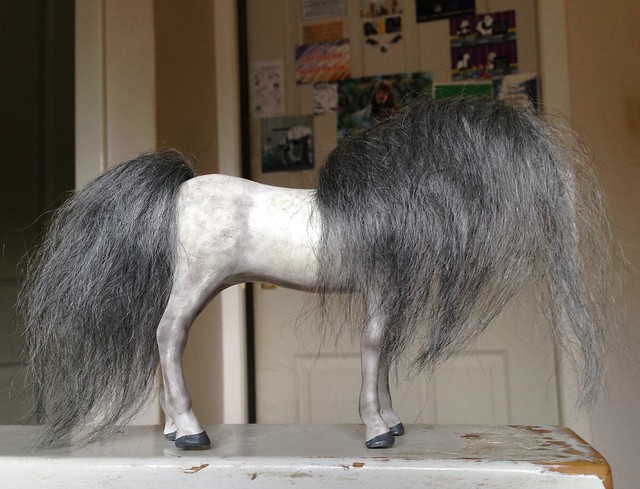
Pretty wild!
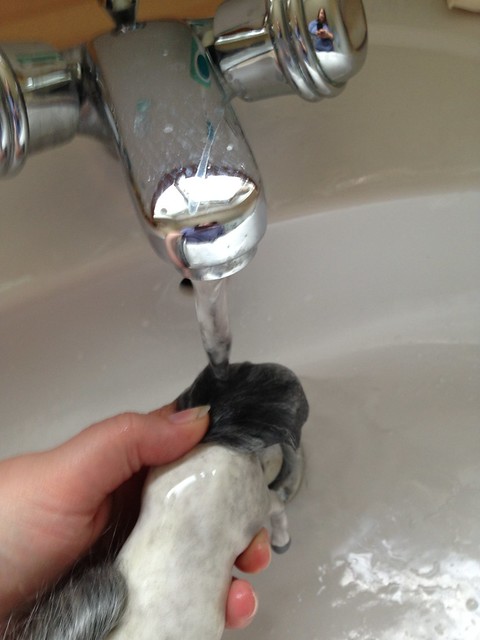
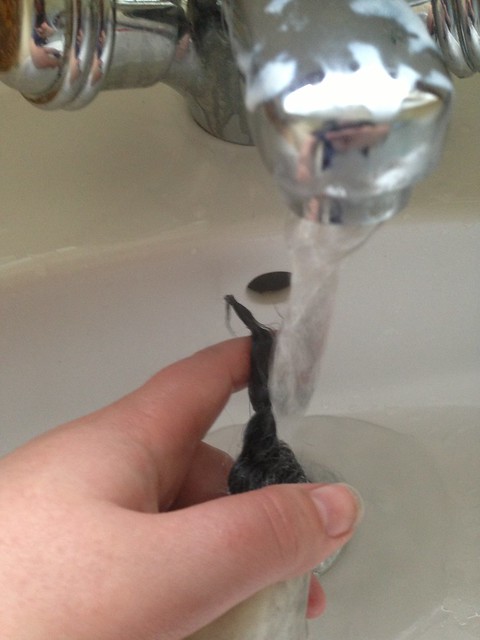
First, you need to wash the hair thoroughly - I just hold it under a warm tap and tease through the hair with my fingers and an old toothbrush until it is totally saturated with water. I always keep my thumb over the very top of the tail to stop water getting into the internal cavity and just in case I'm too rough and pull any hair out - same goes for the mane.
 Julip Hair Styling Tutorial by Elrenia_Greenleaf, on Flickr
He needed another soak as you can see some of the mane is still bone dry. I find this happens most often with thicker manes and tails.
 Julip Hair Styling Tutorial by Elrenia_Greenleaf, on Flickr
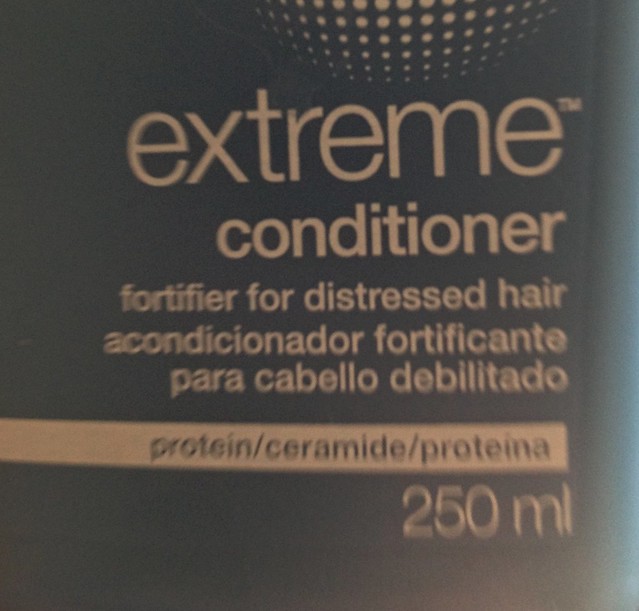
With the hair totally soaking wet, it's time to add some conditioner - I used a pea sized amount of whatever this stuff is (my mum's, lol) and gently rubbed it through the hair with my fingers.
 Julip Hair Styling Tutorial by Elrenia_Greenleaf, on Flickr
Now is probably a good time to brush through the hair with an old toothbrush again, still keeping a thumb over the top of the hair to stop anything from getting pulled out. Once you've got the conditioner on, give it a thorough rinse, using the toothbrush again to make sure every last bit of soapy stuff is gone.
 Julip Hair Styling Tutorial by Elrenia_Greenleaf, on Flickr
Now leave it to drip dry.
 Julip Hair Styling Tutorial by Elrenia_Greenleaf, on Flickr
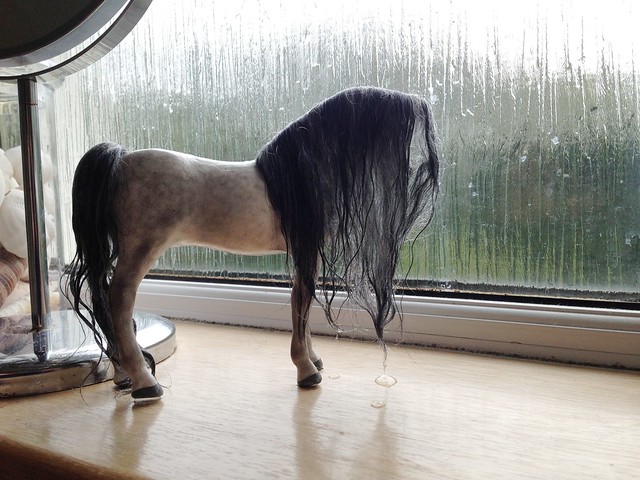
Once dry, it will still probably look a bit wild, but the mohair will be a lot easier to work with, and depending on the type, you can get some nice waves in it like this.
 Julip Hair Styling Tutorial by Elrenia_Greenleaf, on Flickr
 Julip Hair Styling Tutorial by Elrenia_Greenleaf, on Flickr
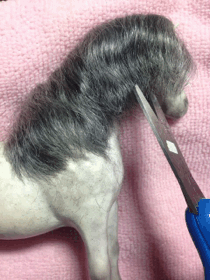
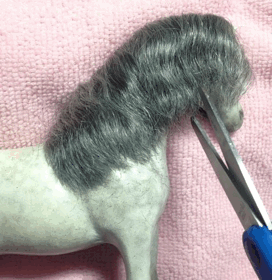
When it comes to cutting the hair, never - I repeat - never cut straight across. It'll look awful, trust me! Instead, cut upwards with little snips at a time to give the ends a much more natural look.
(Obviously be careful you don't stab your horse with the scissors!)
Once everything is the right length, I usually soak the hair again, this time using the toothbrush to get everything into the position I want it to have (parted forelocks etc) then leave it to air dry. Occasionally, you may have to repeat this but in my experience this is only required on exceedingly thick hair. XD
I sometimes wind the tail around the hind legs while it's damp as I've found it holds its shape better when you do that but it isn't necessary.
 Julip Hair Styling Tutorial by Elrenia_Greenleaf, on Flickr
 Julip Hair Styling Tutorial by Elrenia_Greenleaf, on Flickr
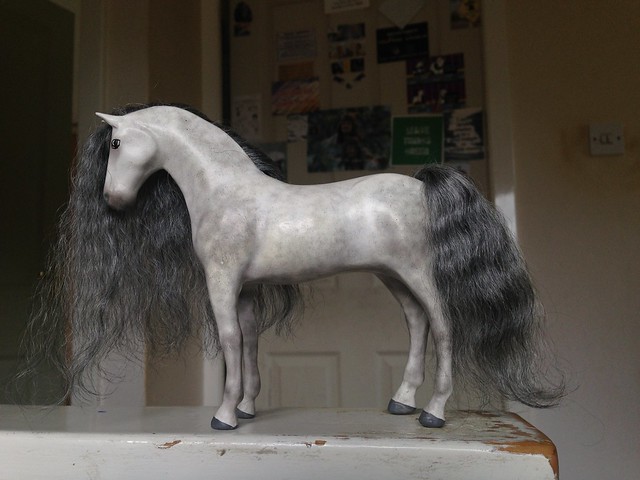
The next day...
Tada!
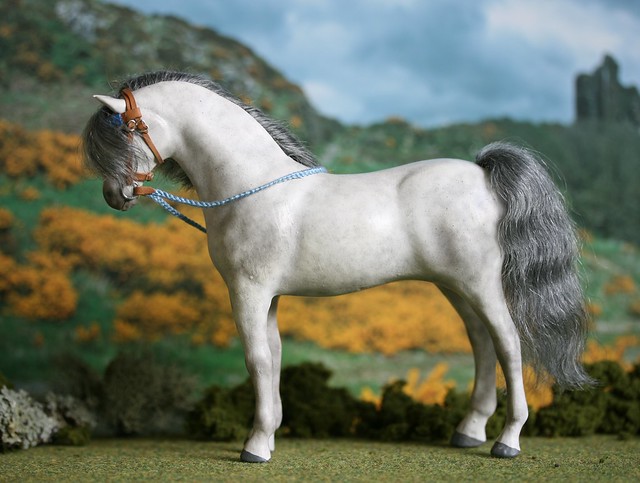 Quinn by Elrenia_Greenleaf, on Flickr
 Quinn by Elrenia_Greenleaf, on Flickr
So yeah, I hope that was useful and if you use this guide it'd be good to see the before and after shots!
To start off with you will need a Julip with mohair already in place - this is my recent newbie from the Lakeland Live, Quinn, with his hair as it was when I bought him. (although probably a little worse for wear thanks to being packed in a box for the journey home.)
Julip Hair Styling Tutorial by Elrenia_Greenleaf, on FlickrJulip Hair Styling Tutorial by Elrenia_Greenleaf, on FlickrPretty wild!
First, you need to wash the hair thoroughly - I just hold it under a warm tap and tease through the hair with my fingers and an old toothbrush until it is totally saturated with water. I always keep my thumb over the very top of the tail to stop water getting into the internal cavity and just in case I'm too rough and pull any hair out - same goes for the mane.
Julip Hair Styling Tutorial by Elrenia_Greenleaf, on FlickrHe needed another soak as you can see some of the mane is still bone dry. I find this happens most often with thicker manes and tails.
Julip Hair Styling Tutorial by Elrenia_Greenleaf, on FlickrWith the hair totally soaking wet, it's time to add some conditioner - I used a pea sized amount of whatever this stuff is (my mum's, lol) and gently rubbed it through the hair with my fingers.
Julip Hair Styling Tutorial by Elrenia_Greenleaf, on FlickrNow is probably a good time to brush through the hair with an old toothbrush again, still keeping a thumb over the top of the hair to stop anything from getting pulled out. Once you've got the conditioner on, give it a thorough rinse, using the toothbrush again to make sure every last bit of soapy stuff is gone.
Julip Hair Styling Tutorial by Elrenia_Greenleaf, on FlickrNow leave it to drip dry.
Julip Hair Styling Tutorial by Elrenia_Greenleaf, on FlickrOnce dry, it will still probably look a bit wild, but the mohair will be a lot easier to work with, and depending on the type, you can get some nice waves in it like this.
Julip Hair Styling Tutorial by Elrenia_Greenleaf, on FlickrJulip Hair Styling Tutorial by Elrenia_Greenleaf, on FlickrWhen it comes to cutting the hair, never - I repeat - never cut straight across. It'll look awful, trust me! Instead, cut upwards with little snips at a time to give the ends a much more natural look.
(Obviously be careful you don't stab your horse with the scissors!)


Once everything is the right length, I usually soak the hair again, this time using the toothbrush to get everything into the position I want it to have (parted forelocks etc) then leave it to air dry. Occasionally, you may have to repeat this but in my experience this is only required on exceedingly thick hair. XD
I sometimes wind the tail around the hind legs while it's damp as I've found it holds its shape better when you do that but it isn't necessary.
Julip Hair Styling Tutorial by Elrenia_Greenleaf, on FlickrJulip Hair Styling Tutorial by Elrenia_Greenleaf, on FlickrThe next day...
Tada!
Quinn by Elrenia_Greenleaf, on FlickrQuinn by Elrenia_Greenleaf, on FlickrSo yeah, I hope that was useful and if you use this guide it'd be good to see the before and after shots!


 amp it down again to get it back on the other side, I'm not sure I like it on this side.